Cap is sewn from cotton on a thin batiste lining. The volume is adjustable drawstring. This style of cap looks very impressive from striped fabric.
This model is a six-piece cap sewn on this pattern.
She is also good because it can “change the face.” If you dress her before, then this is a cap from the sun. And if you insert a feather on the side and back – a hat for walking in the woods and hunting :-)) We didn’t go on hunting, but we used the cap from the sun all the time.
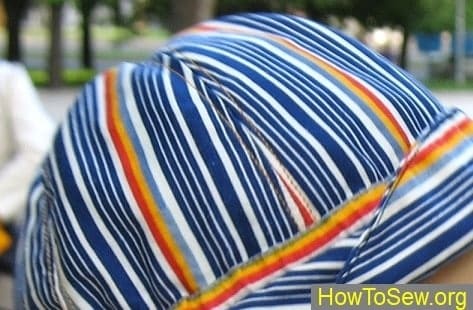
When sewing stripes, be sure to cut all the details in one layer. If there are repeating details (as in this case you need to cut six identical wedges), then I draw the direction of the strips directly on the pattern from the tracing paper and then apply the finished “guiding” strips to the next part. So all the details are the same. Then you need to carefully everything, combining the strips, to connect a small seam. Why small, so that the strips do not come off when sewing on a sewing machine. Here even two millimeters play a role.
So back to our cap: we connected the wedges, ironed and stitched them to the edge. They did the same with the underlay.
Cap wedges tip: Before stitching the last wedge of the lining, and measure the volume of the cap from the main fabric and lining. All the same, six wedges, and an error may form. There is a mismatch in volume. It must be corrected with the “last seam”. They did and thought about how clever I am – I checked it in advance and now everything will be fine! Mismatch in volume is a problem where there are many parts connected together (wedges of hats, skirts, etc.). Therefore, I do exactly as I described above when sewing.
Then the cap fields. They are double, but not from the lining fabric, but from the main one. They carved, stitched two parts face to face along the outer edge, twisted it, designed the edge. Then you need to sew close to the edge with finishing threads. You can take the thread in color as a fabric, or you can have a different color. How do you decide.
When the fields and the main fabric of the hexagonal cap are connected together, there are two ways to connect the lining to the second part of the fields:
The first is the same as with the main fabric, but then you need to leave a hole in the lining so that you can turn the cap over your face through it and then iron and stitch it to the edge.
The second one is that you can tuck the edge of the hexagon cap from the subclad down by 0.5 mm, put on the edge of the unstitched fields and sew a lining on one lower line, and at the same time stitch the edge of the junction of the hexagon cap and fields on the face.
That’s all cap is ready.
